ADVERTISEMENT
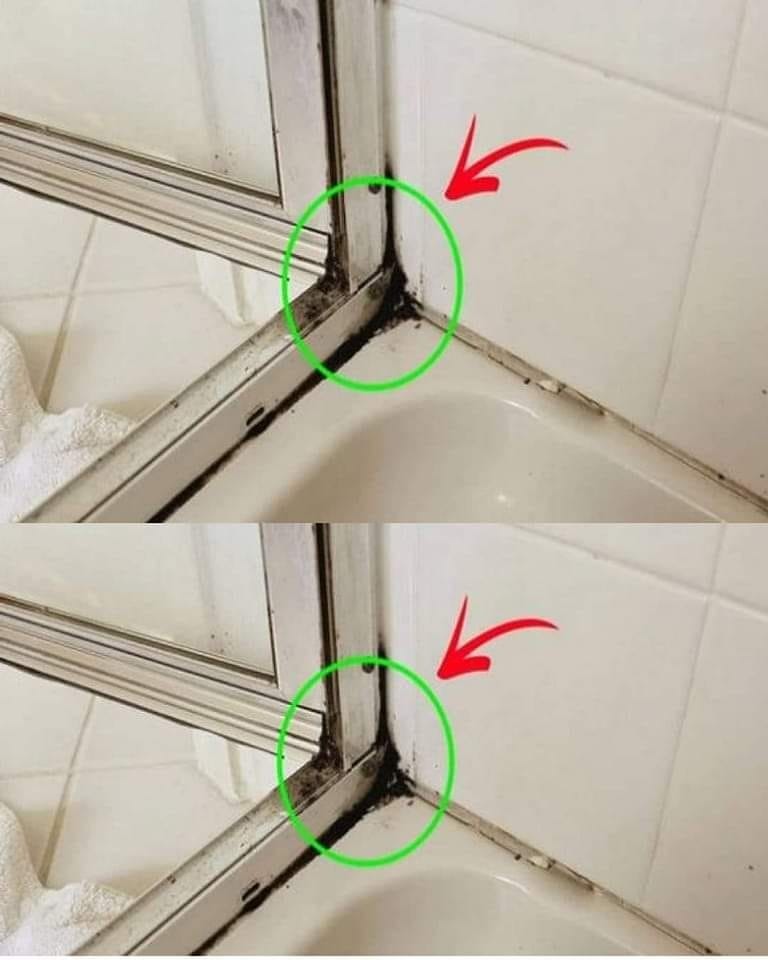
Shower silicone mildew is a common issue that affects bathrooms of all sizes. The unsightly black stains and buildup, as shown in the image, occur in the corners and edges where moisture accumulates. While mildew may seem stubborn, with the right approach, it can be eliminated efficiently.
This article will explore the fastest and most effective ways to remove mildew from shower silicone, provide tips to prevent its return, and ensure your bathroom stays clean and hygienic.
What Causes Shower Silicone Mildew?
Mildew on shower silicone is primarily caused by the following factors:
Excess Moisture: The shower is a high-humidity environment, and silicone seals are constantly exposed to water.
Lack of Ventilation: Without proper airflow, dampness persists, creating the perfect environment for mildew growth.
Soap Residue: Soap scum builds up on silicone seals, providing nutrients for mildew to thrive.
Porous Silicone: Over time, silicone can become porous, allowing mildew to penetrate its surface.
Understanding these causes will help you combat mildew effectively and prevent it in the future.
Tools and Supplies Needed
Before you begin, gather the following tools and materials to ensure a thorough and efficient cleaning process:
White vinegar
Baking soda
Bleach
Hydrogen peroxide
Cotton balls or cotton strips
A small scrubbing brush or toothbrush
Protective gloves
A utility knife (for silicone replacement, if necessary)
Mold-resistant silicone caulk (if replacing silicone)
A spray bottle
Paper towels or a microfiber cloth
Step-by-Step Guide to Removing Mildew
1. Assess the Situation
Inspect the mildew-affected areas closely. Determine whether the mildew is only on the surface or if it has penetrated deep into the silicone. Surface-level mildew can be removed with cleaning solutions, while deeply ingrained mildew may require replacing the silicone.
2. Start with Natural Solutions
Natural solutions are effective for mild to moderate mildew stains and are safe to use regularly.
Option 1: White Vinegar
Fill a spray bottle with undiluted white vinegar.
Spray the affected silicone generously.
Let it sit for 30-60 minutes.
Use a toothbrush to scrub away the mildew.
Rinse thoroughly with warm water and dry with a cloth.
Option 2: Baking Soda Paste
Mix baking soda with water to form a thick paste.
Apply the paste to the mildew-stained areas.
Scrub with a toothbrush or small brush.
Rinse and dry the area completely.
3. Tackle Stubborn Mildew with Bleach
For more persistent mildew, bleach is highly effective.
Mix one part bleach with two parts water in a spray bottle.
Apply the solution to the mildew-affected silicone.
Place cotton balls or strips soaked in the bleach solution directly onto heavily stained areas.
Let it sit for 30 minutes to an hour.
Scrub gently, rinse, and wipe dry.
Important: Ensure proper ventilation when using bleach and wear gloves to protect your skin.
4. Use Hydrogen Peroxide as an Alternative
If you prefer a non-bleach method, hydrogen peroxide is a powerful disinfectant.
Soak cotton balls or strips in hydrogen peroxide.
Press them onto the affected areas.
Leave them for an hour or longer.
Scrub, rinse, and dry the silicone seals.
5. Remove and Replace Silicone (If Necessary)
If mildew has deeply penetrated the silicone, cleaning may not be enough. Replacing the silicone is the only way to ensure a long-lasting solution.
Steps for Silicone Replacement:
Remove Old Silicone:
Use a utility knife to carefully cut away the old silicone seal.
Scrape off any residue and clean the area thoroughly.
Clean and Prepare:
Ensure the surface is completely dry before applying new silicone.
Apply New Silicone:
Use a mold-resistant silicone sealant.
Apply the sealant evenly and smooth it with a damp finger or silicone tool.
Allow it to cure for at least 24 hours before using the shower.
Preventing Mildew from Returning
Prevention is the key to maintaining a mildew-free shower. Follow these steps to keep your bathroom clean and fresh:
Read more on next page
ADVERTISEMENT
